The postflop condition editor - 3
In this third and final section on the postflop editor we'll go over the remaining buttons in this menu.
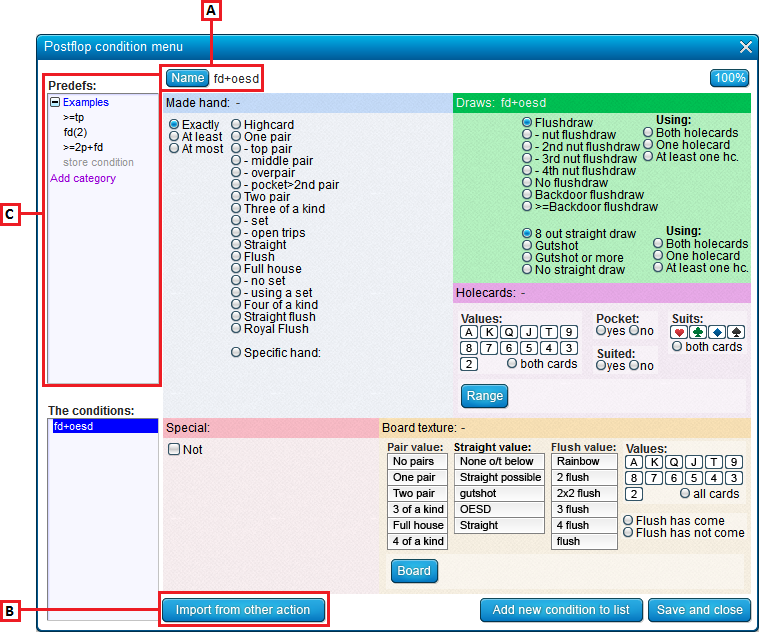
A) The "Name" button
When you enter a condition in the menu, the software will automatically generate a name for it.
For example, in the pic above the name that is auto-generated is "fd+oesd".
Should you however want to enter a different name for the condition yoursélf, this is also possible.
For that, click the "Name" button and enter your own custom name.
B) Import conditions from other action
To import the list of conditions from another action, press this button.
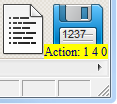
You will now get a dialog where you need to enter the identifier numbers of the action you want to import from:

To gét the identifier number for an action, mouse over it in the tree.
The identifier numbers of the item you're mousing over will appear in yellow in the lower right of the screen.
For example, in the pic below the identifier numbers are 1 4 0.
C) Predefined conditions
Here you can store/load your own predefined conditions.
The conditions are subdivided into categories.
- To load a condition, double-click it.
- To see what's in a condition, mouse over it.
- To delete a condition, select it by clicking it and then press Del on your keyboard.
- To add a range to a category, click "Store condition ..."
- To add a category, click "Add category ..."
- To change the order of conditions within a category, drag and drop them
- To change the order of categories, again, drag and drop them
The hint system
To quickly get some hints on how all fields in this menu work, turn ON "Help->Display hints in menus".
Whenever you now mouse over an item, a popup will give information on how to use it.
| << Previous | Contents | Next >> |